
How to create a guide file from satellite imagery
GeoDataFarm fetches Sentinel-2 imagery directly from the Copernicus Data Space Ecosystem — no more manual downloads. Pick a field, choose a (cloud-free) date, and the plugin builds an NDVI or MSAVI2 variable-rate prescription for you, exported as a shapefile or ISO-XML guide file ready for your terminal. It works for fields across all of Europe, and Copernicus data is free.
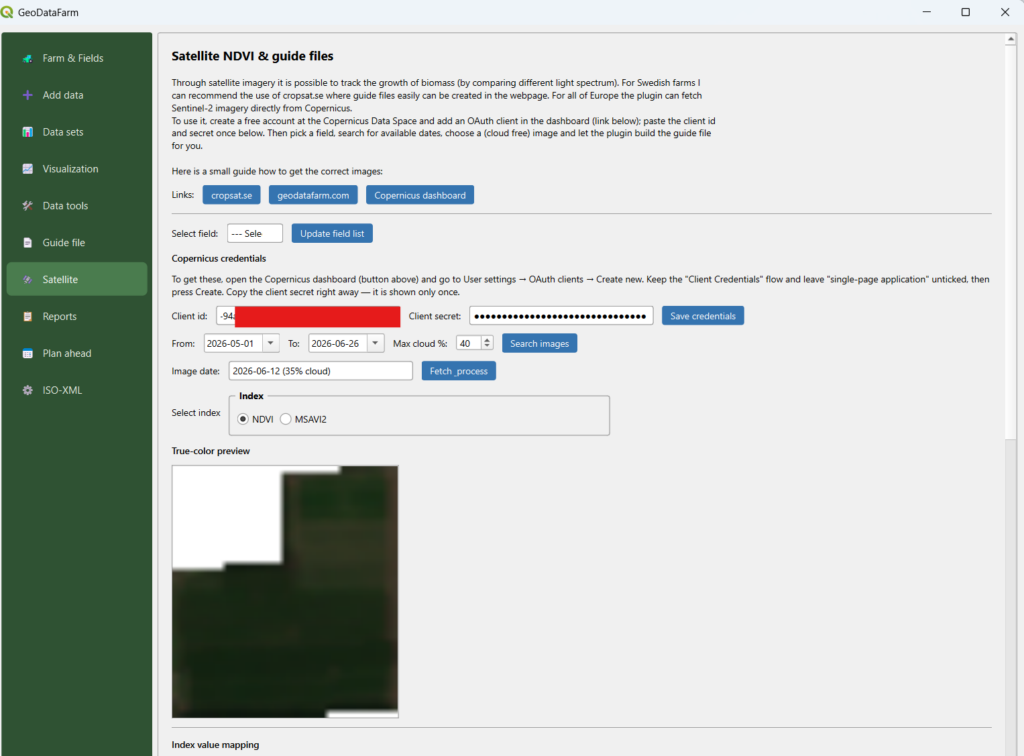
1. One-time setup: connect to Copernicus
You only need to do this once. It’s free.
- Create a free account at the Copernicus Data Space Ecosystem.
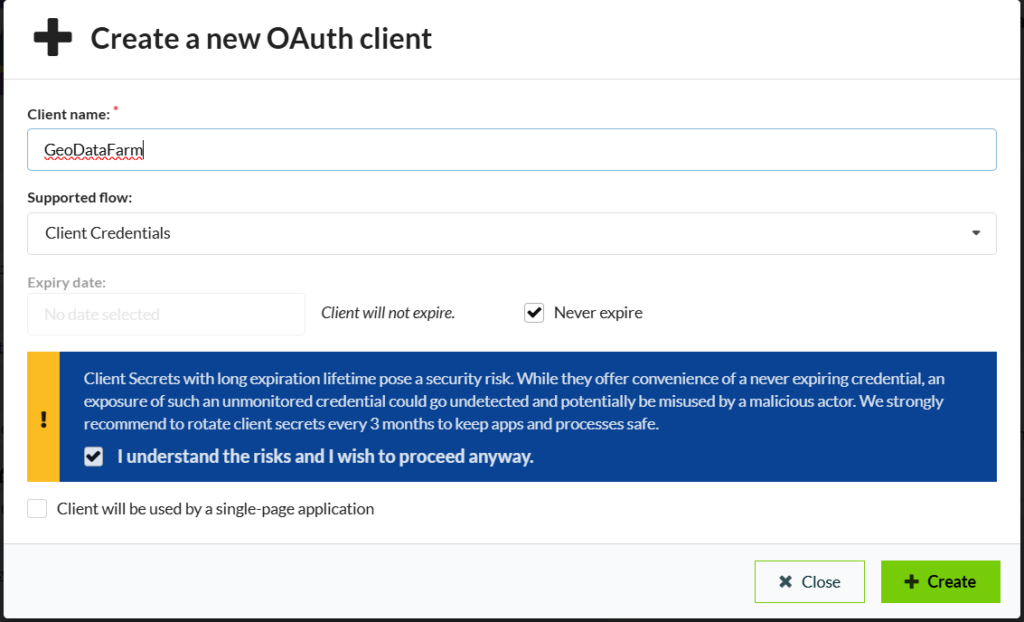
- Open the Sentinel Hub dashboard (shapps.dataspace.copernicus.eu/dashboard), go to User settings → OAuth clients → Create new, and give it a name.
- In the Create a new OAuth client dialog, the only thing you must set is a name. Leave the defaults as they are:
- Supported flow: Client Credentials — keep this (it’s the default).
- Do NOT tick “Client will be used by a single-page application.” That makes a public client with no secret, which won’t work with the plugin.
- Never expire is fine; Copernicus just recommends rotating the secret every few months. Then press Create.
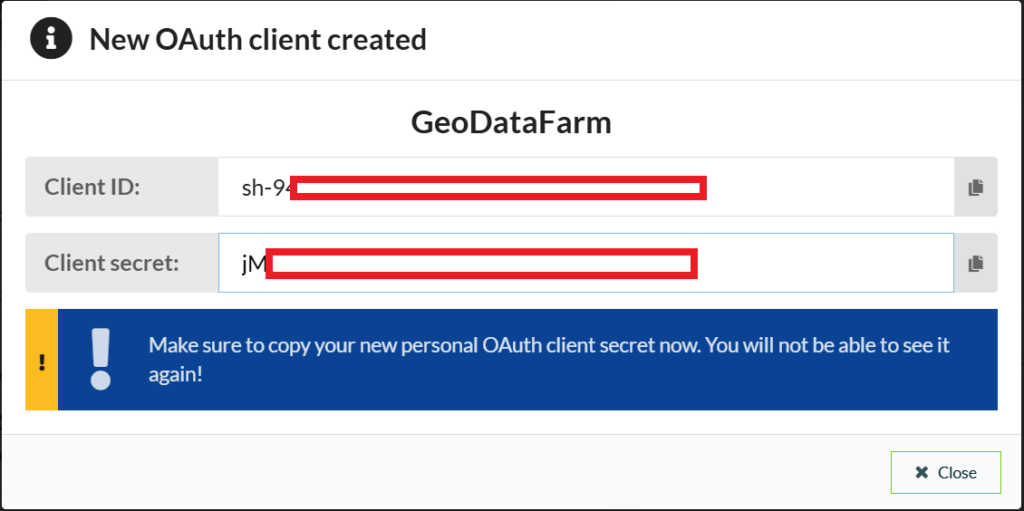
- The next screen shows the client id and the client secret. Copy the secret now — it is shown only once. (The client id stays viewable later; the secret does not. If you lose it, just create another OAuth client.)
- In GeoDataFarm, open the Satellite tab, paste both into Client id and Client secret, and click Save credentials. They are stored locally on your machine, so you won’t have to enter them again.
2. From image to prescription (Satellite tab)
With your credentials saved, building a prescription is a quick loop on the Satellite tab:
- Select a field, set a From / To date range and a max cloud %, then click Search images. Every available Sentinel-2 date is listed with its cloud cover, so you can pick a clear day.
- Pick a date and click Fetch & process. The plugin downloads the red and near-infrared bands clipped to your field, computes the vegetation index, and shows a true-color preview of the field next to it — so you can confirm the scene really is cloud-free before you commit.
- Choose NDVI or MSAVI2, then adjust the index value mapping — the application rate you want for each vegetation level.
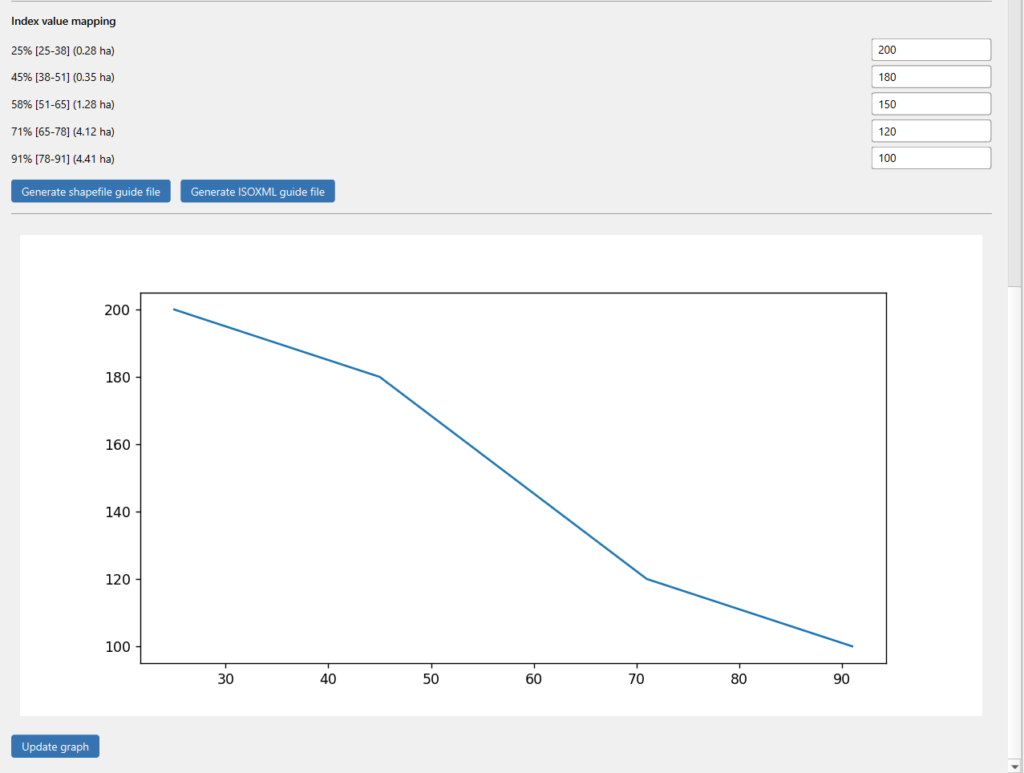
4. Click Generate shapefile guide file or Generate ISOXML guide file. The plugin jumps straight to the Guide file tab with “Use satellite data” already selected and your index + rates loaded.
3. Finish the guide file (Guide file tab)
Arriving from the Satellite tab, the first two steps (choosing a data source and attributes) are skipped automatically — your satellite index and rate mapping are already in place. You only set the output:
- Output settings — cell size, EPSG and rotation (shapefile), or cell size, product and value scale (ISO-XML).
- A file name and an output folder.
- Optional Planned date of usage — tick it to also store the guide file in your farm database as a planned operation on the chosen date. This works for both satellite and field-based guide files.
- Press Create Guide File. If a file with that name already exists, you’ll be asked to choose a different name.
Good to know
- Free tier: Copernicus gives every account a generous monthly processing quota — more than enough for field-scale NDVI maps.
- Resolution: Sentinel-2 imagery is 10 m per pixel.
- Cloud cover: if the true-color preview looks too cloudy, pick another date from the list, or lower the max cloud % and search again.
- Two export formats: a shapefile for general use, or an ISO-XML (ISO 11783) task dataset for direct import into many tractor terminals.